Safely Set Up Test Rizful Vaults with NWC
When experimenting with Nostr Wallet Connect (NWC), it's smart to use dedicated test vaults instead of your main vault. This keeps your primary funds safe while you learn how NWC works with different apps.
By creating vaults with small balances and descriptive names, you can:
- 🧪 Experiment freely without risking your main funds
- 🏷️ Track activity by giving each vault a purpose-specific name
- 🔍 Debug easily by knowing exactly which vault is connected to which app
Step 1: Create a New Vault
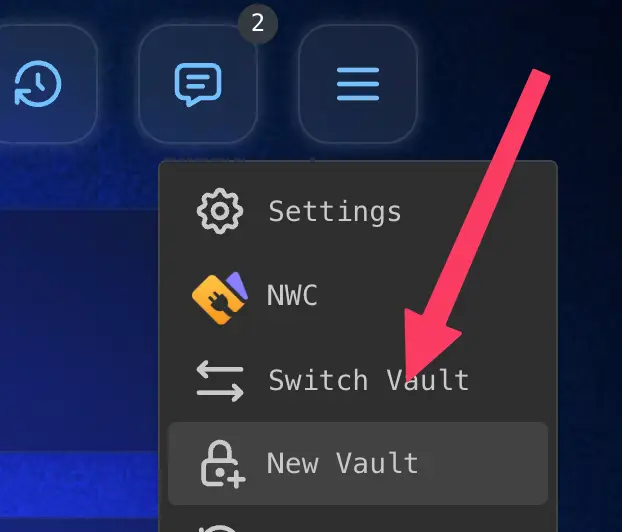
From the main menu, tap New Vault to create a fresh vault for testing.
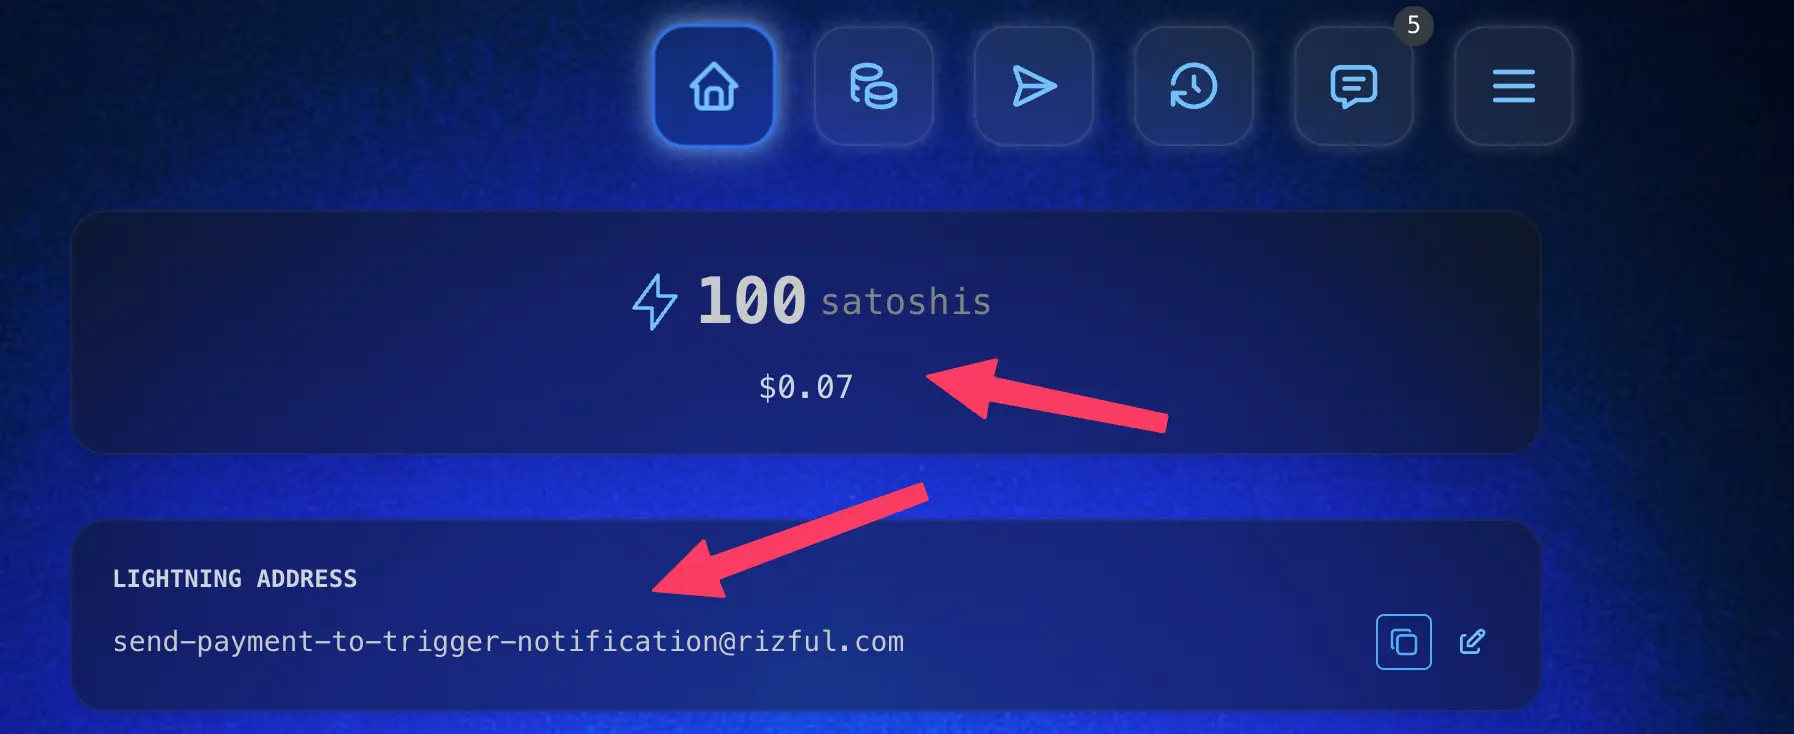
Step 2: Edit the Lightning Address
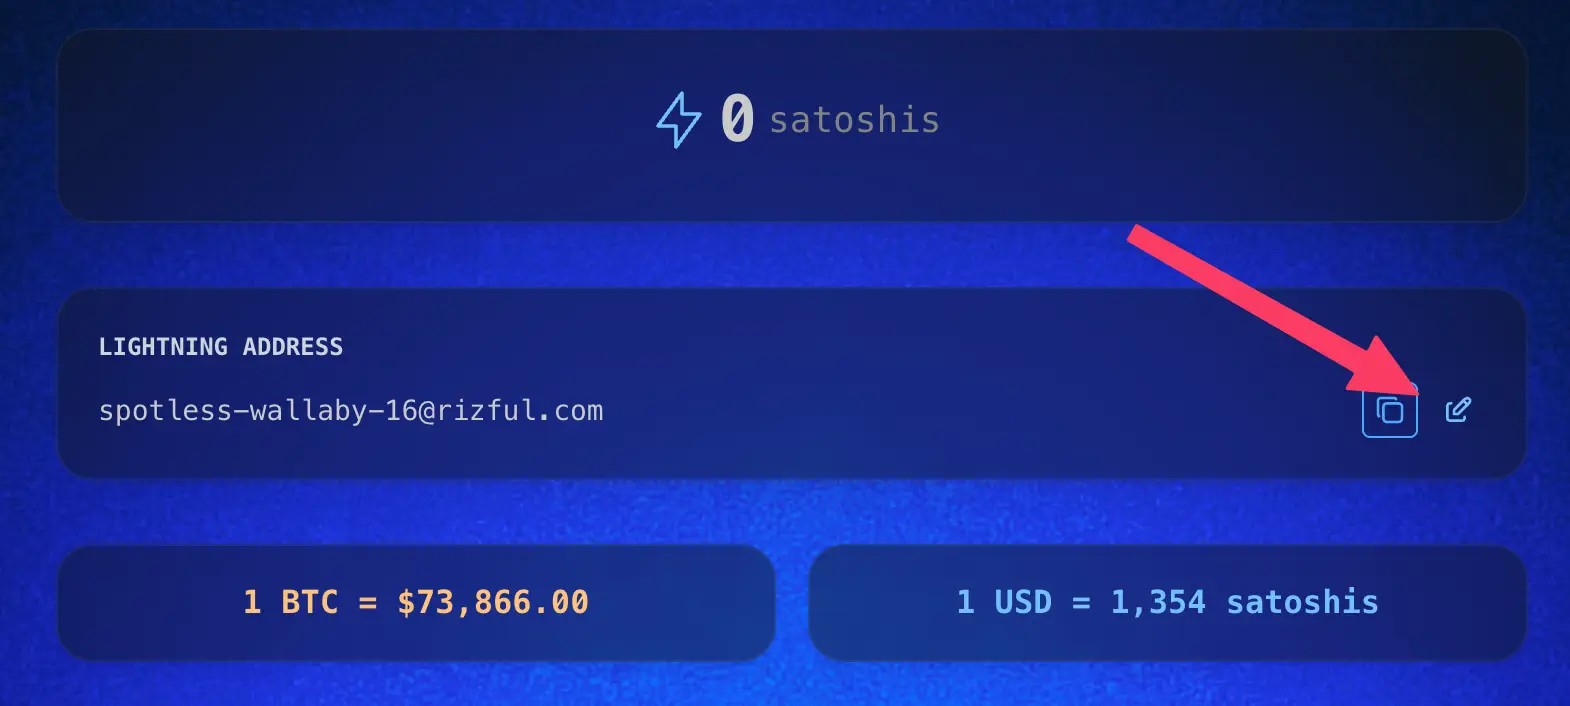
On your new vault's home screen, tap the edit icon next to your Lightning Address to customize it.
Step 3: Give It a Descriptive Name
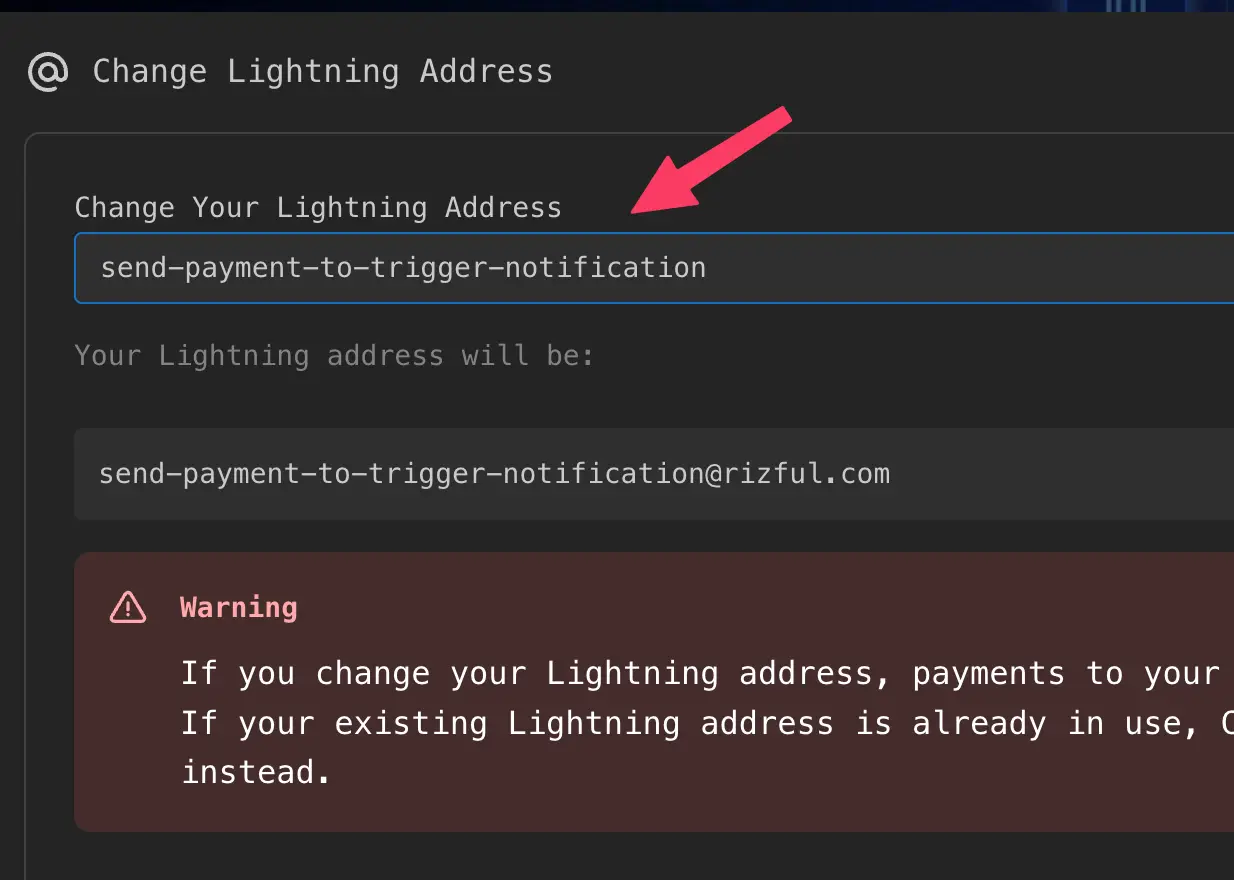
Change the Lightning Address to something that clearly identifies the vault's purpose. For example:
send-payment-to-trigger-notificationreceive-payment-to-trigger-notificationdamus-zap-testprimal-nwc-test
This makes it easy to remember what each vault is for when you're switching between them.
Step 4: Create Multiple Test Vaults
Repeat steps 1-3 to create additional vaults as needed. For testing NWC send and receive functionality, you might want:
- One vault for sending payments
- One vault for receiving payments
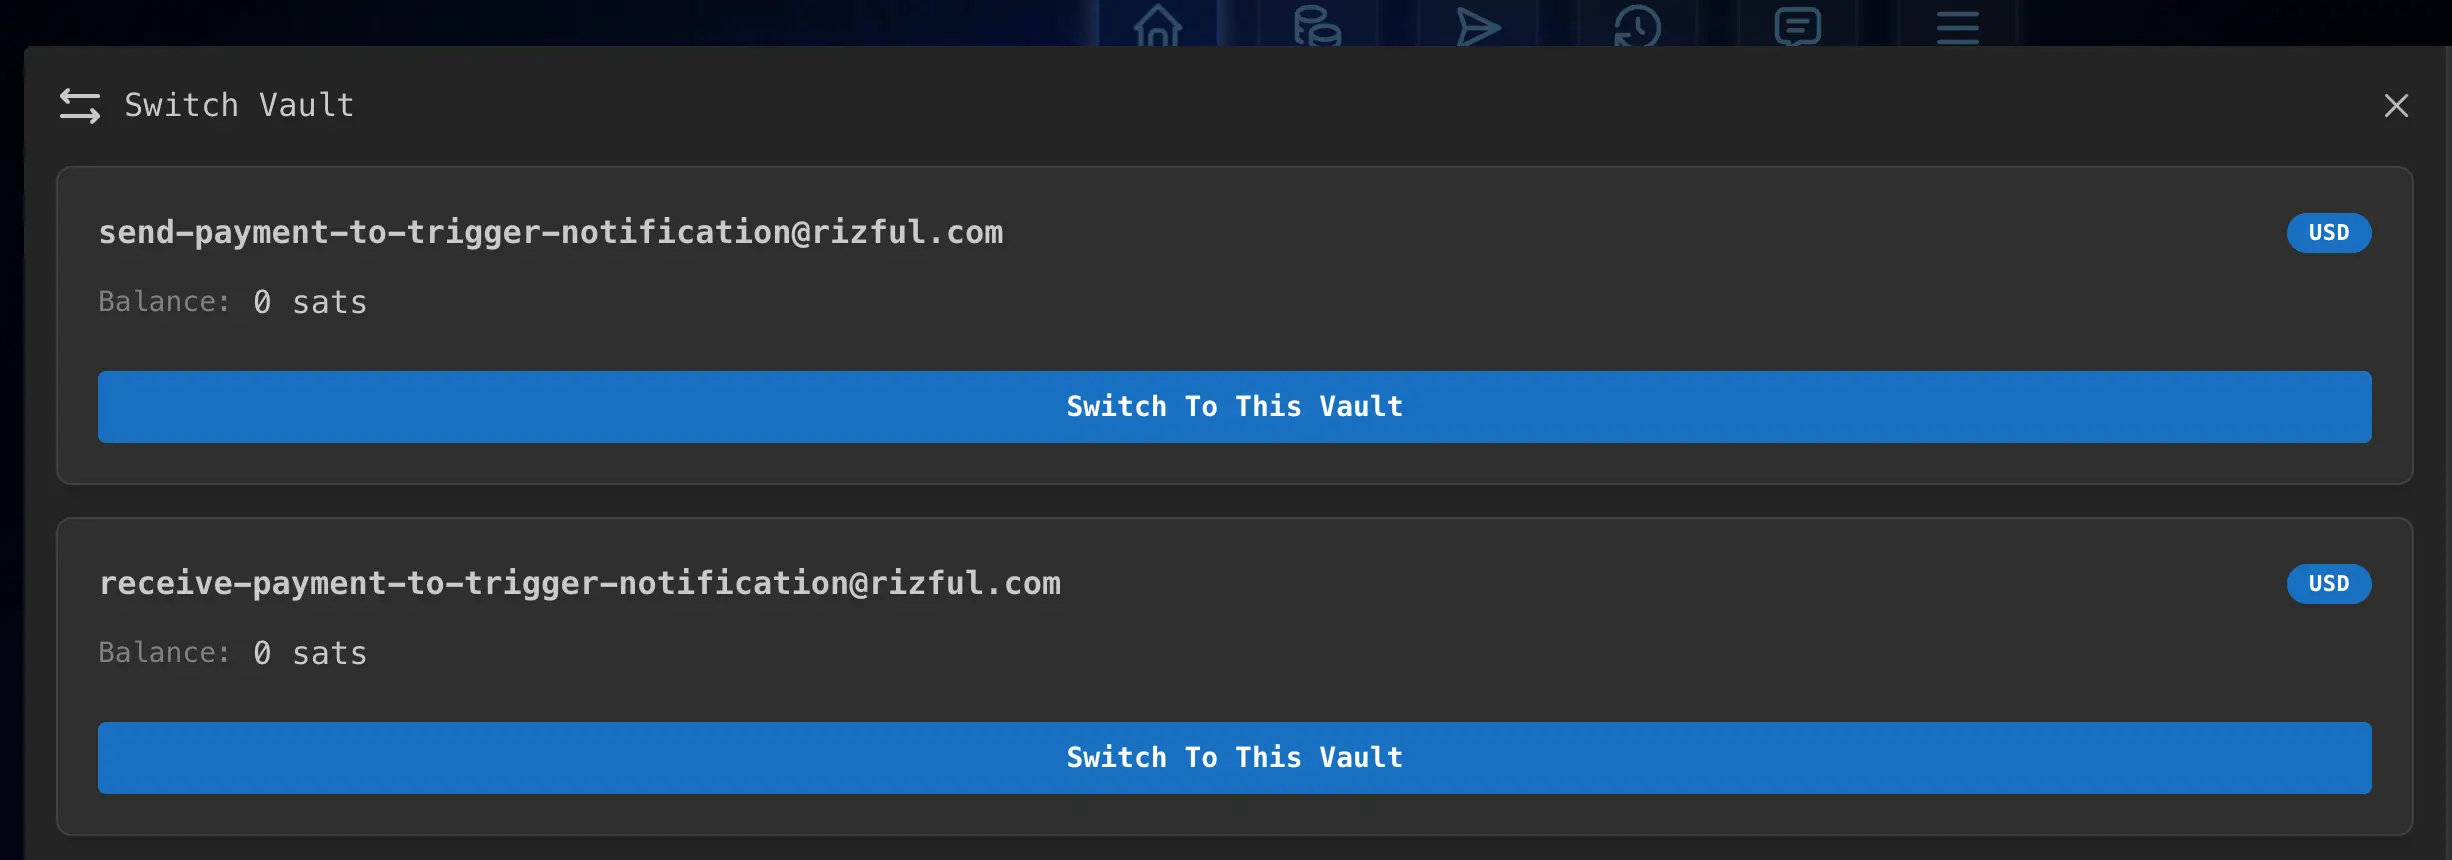
You can switch between them using Switch Vault from the menu.
Step 5: Fund Your Test Vault
Deposit a small amount of satoshis into your test vault—just enough to run your experiments. 100 satoshis is plenty for most NWC testing.
Next Step: Get NWC Codes for Your Test Vaults
Now that your test vaults are set up, you're ready to create NWC codes for them!
👉 Get a Send & Receive NWC Code — Learn how to create NWC codes that allow apps to send and receive payments from your test vault.
By using dedicated test vaults with small balances, you can safely experiment with NWC integrations without putting your main funds at risk.