A Clearnet IP For Your Node
This application requires very fast, reliable, low latency connections
As we saw in our discussion of Lightning as an internet application, payments and other actions on the Lightning network require a significant amount of chatter between nodes.
At the same time, when consumers make payments, they expect successful payments really, really fast: Ideally in under one second.
For this reason, routing nodes need to have very low-latency connections between them.
What is a "Clearnet" connection
As far as I understand it, "Clearnet" is internet slang meaning "your IP address is visible to everyone."
But on a practical level, it just means that the world can "see" your IP address. We already discussed the problem of IP Addresses. It's like a license plate.
But, there is an important upside: It's also very, very fast to communicate with another computer on the internet if you have that computer's IP Address.
A serious routing node should have a Clearnet connection
Assuming you followed the setting up a lightning node guide, your node currently has a Tor connection.
Tor uses a bunch of complicated magic to totally obfuscate your IP address: Tor obfuscates your IP address, making it extremely difficult to trace the originating subnetwork of a user's data.
There are routing nodes on the Lightning Network that only use Tor, but a consensus is building in the community that, when it comes to high-volume routing nodes, Tor is not good enough, because it has two severe problems:
- Tor can lead to intermittent internet connectivity. Nodes connected via Tor can tend to disappear and reappear frequently from the network graph.
- Communication over Tor can suffer from high latencies.
For this reason, if you are serious about your routing node, you need to have a clearnet connection.
A Clearnet IP in a data center (somewhat) protects your privacy
In this tutorial, we will be setting up a permanent IP address for your node, by routing traffic from a VPS (virtual private server), located in a data center, to your LND node.
This benefit of this strategy is that your node will be reachable on Clearnet, but you will not reveal the actual physical location of your node, because your node's IP address will be hidden behind the VPS's IP address.
If an attacker is trying to locate you, they can look up your IP address, they'll see the location of the data center: like "Amazon Web Services, Virginia", or similar.
So to this extent, a casual observer won't be able to discover your identity from your node's IP address.
However, there is a giant loophole: Your country's legal system.
In the United States, if someone really wants to track you down, all they need to do is get a court order, and then present that court order to AWS or Hetzner or whoever your VPS provider is, and that provider will be forced to reveal your identity.
A court order like this is not necessarily easy to obtain, but, if, for example, America's FBI or other law enforcement wants to find out who you are, they can probably figure out a way to convince a judge to give them such a court order.
In Europe it's probably a similar situation. If the government or a well-funded private entity with a convincing legal case wants to unmask you, that legal case might be successful.
So I can't be assured of privacy if I have a Clearnet IP?
Correct. If you are very worried about privacy, you should not use a Clearnet IP. Use Tor instead. Instead of reviewing the rest of the instructions on this page, please enjoy the rest of your day in a dignified fashion, perhaps with some high-quality marijuana, depending your legal jurisdiction.
OK. I want a Clearnet IP. What's the easiest way to get it?
You can't use any mainstream VPN provider, because they won't let you open a port for inbound traffic. Also -- you need a static IP.
But: Currently there is one service provider who specializes in this exact service: TunnelSats.
Unfortunately, their solution currently assumes that your node is using systemd, so it won't work for our Docker-only setup.
Maybe by the time you read this, they might support our particular setup, so go ahead and inquire with them, if you want.
Are there existing tutorials to set up a Clearnet IP?
There are existing tutorials, and they range in complexity from pretty fucking complicated to insanely fucking complicated.
Not only that, but all of these tutorials require you to manually run terrifying iptables commands, like:
sudo iptables -A FORWARD -i eth0 -o wg0 -p tcp --syn --dport 9735 -m conntrack --ctstate NEW -j ACCEPT
sudo iptables -A FORWARD -i eth0 -o wg0 -m conntrack --ctstate ESTABLISHED,RELATED -j ACCEPT
sudo iptables -A FORWARD -i wg0 -o eth0 -m conntrack --ctstate ESTABLISHED,RELATED -j ACCEPT
You might disagree with me, but I absolutely refuse to directly run iptables commands of any kind on any machine that I control.
iptables is a huge, fat foot-gun, and if you are a reasonably stupid developer like myself, and run the wrong command, you can (and will!) lock yourself out of your machine.
So, again, the solutions I list above do work. Go ahead and use one, if you prefer, and if you are ambitious enough that you'd like to adjust iptables on your machine on an ad-hoc basis.
But: I have come up with an adaptation of the least complicated solution which, while still pretty damn complicated, DOES NOT REQUIRE YOU TO RUN ANY iptables rules.
I believe my adaptation might be easier to set up (as long as you are using Docker), but it's still not "super simple", and additionally my solution requires that you fiddle with a domain name.
Enough talk, let's get started
Pick a day to do this when you have at least a couple hours free from distractions. Don't take bong hits before you do this. There are a bunch of steps you need to follow to get this right.
Get a VPS
Choose a VPS that runs in a data center that is reasonably close to your physical node location, i.e. ideally less than 500 miles.
This might seem silly, but ping times are important, and you want the latency between your node computer and your VPS to be as low as possible.
Don't believe me? Check your latency now to different AWS data centers: https://aws-latency-test.com/.
And don't think that 200ms doesn't matter! Those of us with backgrounds in web development all take it as an article of faith that users notice ANY delays above 100ms, and any Lightning network payment involves multiple hops, and lots of communication! That 200ms of latency will quickly turn into 2000ms because of the number of packets that are necessary to send back and forth.
So, the VPS needs awesome networking -- but you can basically be assured of that as long as you run it in any big, mainstream data center, provided by any members of the evil empire: Amazon, Google, Azure, Digital Ocean, Hetzner, etc.
No need to get fancy networking, extra-fast storage, or anything complicated like that for the VPS.
And: This VPS does not need to be high-powered. For my purposes, I chose:
- VPS running Ubuntu 22.04
- Basic/shared CPU, 1GB RAM, 25 GB SSD, $6/month
Also, remember to pre-specify your SSH key when you create the VPS, so you can get into it via SSH.
Your VPS provider will give you an IP address. This will become the public IP address of your node!
We'll be using this IP Address in lots of different places, so, for the purposes of this tutorial, whenever you see:
VPS_IP_ADDRESS
... Use the actual IP Address that your VPS provider has given you.
We're going to run Wireguard in a Docker container
Wireguard is the newest and coolest VPN solution that is built to do exactly this thing we want to do with it. It's also built-in to the Linux kernel, so it is insanely fast.
Get a new domain or repurpose a domain you already own
We need a domain so we can securely access the web interface of our Wireguard instance.
Choose your domain, and then invent a new and exciting subdomain -- it doesn't matter what it is.
For example, if your domain is mylightningnode.com, then choose a subdomain like something, to make the fully qualified domain (FQD): something.mylightningnode.com.
Nobody is going to see this fully qualified domain name (FQD) but you, so it really doesn't matter what it is.
Going forward in this tutorial, I am going to use the FQD:
SUBDOMAIN.DOMAIN.com
... but you should replace this with one that you own.
Make an A record, pointing your FQD at your VPS ip address
DNS is fun, right?
Luckily, this is pretty much the simplest thing you can do with DNS.
How you do this depends on your DNS provider, but, for Digital Ocean, you can follow this guide: https://docs.digitalocean.com/products/networking/dns/how-to/manage-records/#a-records
Just remember these things:
- Your VPS has an IP address.
- You own a FQD (fully qualified domain)
- You need to make an
Arecord to point the FQD to the IP address.
When you are sure the A record is in place with your DNS provider, go to the next step.
Sign in to your VPS via SSH and run some commands
You should now find yourself at the command prompt in your new VPS.
-
Install Docker and Docker Compose with these directions.
-
reboot:
reboot
- After you reboot, you can verify that Docker is working by running the
hello-worldcontainer
docker run hello-world
- Set up a firewall on this VPS:
apt install ufw
ufw default deny incoming
ufw default allow outgoing
ufw allow OpenSSH
ufw allow 9735 comment 'This port is open for the LND node'
ufw route allow in on wg0 out on eth0
ufw enable
-
If you are feeling paranoid today, install and configure Fail2Ban or Crowdsec.
-
Clone the
LND-With-Dockerrepository
git clone https://github.com/MegalithicBTC/LND-With-Docker
- Create two files:
touch LND-With-Docker/wg-easy/PRIVATE/private.env
touch LND-With-Docker/wg-easy/PRIVATE/Caddyfile
- You're going to need to set a very secure password.
- Go to this page https://bitwarden.com/password-generator/
- Set the "Characters" to 40
- Copy the long generated password
- Edit the
private.env
cd LND-With-Docker
nano wg-easy/PRIVATE/private.env
- Modify, then paste in, these values:
PASSWORD=PASTE YOUR LONG GENERATED PASSWORD HERE
WG_HOST=PASTE YOUR FQD HERE
Let's be 100% clear. The contents of private.env should now look something like this, but with your own values instead of these example values:
PASSWORD=PBewJKFfY9qarwgkMTVbuN48Yz9LgED2td7gzeh5
WG_HOST=SUBDOMAIN.DOMAIN.com
- One more file to modify:
nano wg-easy/PRIVATE/Caddyfile
Modify, then paste in, these lines, using your FQD instead of SUBDOMAIN.DOMAIN.com:
SUBDOMAIN.DOMAIN.com {
  reverse_proxy wg-easy:51821
}
Then, save the file with CTRL+X and then y to save.
- Start the wireguard server with the script:
./start-wireguard-on-vps.sh
You should see logs like:
caddy-1  | {"level":"info","ts":1713046228.3894768,"logger":"http.log","msg":"server running","name":"srv0","protocols":["h1","h2","h3"]}
caddy-1  | {"level":"info","ts":1713046228.3977962,"logger":"http","msg":"enabling automatic TLS certificate management"
wg-easy  | $ wg-quick down wg0
wg-easy  | $ wg-quick up wg0
wg-easy  | 2024-04-13T22:10:29.155Z WireGuard Config syncing...
wg-easy  | $ wg syncconf wg0 <(wg-quick strip wg0)
wg-easy  | 2024-04-13T22:10:29.291Z WireGuard Config synced.
Look carefully in the logs for errors!
If you see no errors, then your wireguard server is up and running!
Get the client configuration file from your wireguard server
I find working with VPN and proxying to be inherently confusing, because you are switching back and forth between different computers, and it's easy to get mixed up.
So let's be super clear.
We are dealing with two different computers.
- Your VPS, running in a data center. Let's call this the WIREGUARD SERVER.
- Your LND node, running in your office or home or elsewhere. Let's call this the WIREGUARD CLIENT.
The WIREGUARD SERVER is acting as a VPN (virtual private network) for the WIREGUARD CLIENT. Got it?
Let's grab the configuration file
-
In any web browser, put your FQD (SUBDOMAIN.DOMAIN.com) in the address bar, and press enter.
-
You should see a login interface, like this:

-
Paste in the password which you previously generated for
/wg-easy/PRIVATE/private.env. -
You should get to a screen like this:

-
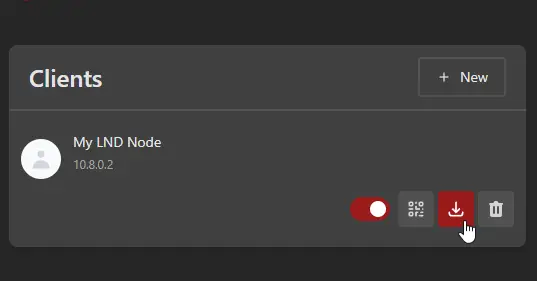
Make a new client. Give it any descriptive name you want.
-
Use the download button to download the CLIENT configuration
Final configuration on your LND node
Now, go back to your main computer, your LND node.
Remember, this is the Wireguard CLIENT. We need to take some steps to tell our CLIENT to use the IP address of the SERVER.
- Run these commands:
sudo apt update
sudo apt install curl
sudo apt install wireguard -y
sudo apt install resolvconf -y
sudo nano /etc/wireguard/wg0.conf
- Paste in the CLIENT configuration. (The one you just downloaded.)
2.5 (Update, July 2025). You could consider changing PersistentKeepalive = 25 to PersistentKeepalive = 5 in the CLIENT configuration. We've run into a rare issue recently where there is a networking hiccup on server and our client gets disconnected. This might help.
-
Then, save the file with
CTRL+Xand thenyto save. -
Now start Wireguard:
sudo wg-quick up wg0
Your computer may temporarily lose internet access. But within a few seconds...
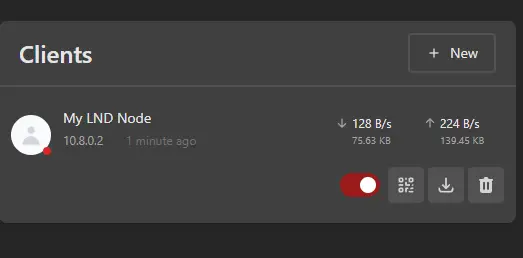
- Look back at your web browser, and you should see traffic starting to be measured in and out of the CLIENT
- Now, at your LND computer (the CLIENT) run these commands to stop the current Wireguard instance, start it again, and set Wireguard to start automatically at boot:
sudo wg-quick down wg0
sudo systemctl enable wg-quick@wg0.service
sudo systemctl start wg-quick@wg0.service
sudo systemctl status wg-quick@wg0.service
From that last command, you should see a response, in the console, from Wireguard with the notice active (exited). Now you're protected by Wireguard!
Let's run some tests now
Let's take a couple steps to be 100% sure everything is working.
At your LND computer, run:
curl icanhazip.com
You should see the VPS_IP_ADDRESS! So now, from the outside world, it looks like your LND Node has the IP address of a data center.
Next, one more thing to test.
We want to make sure that port 9735 is open -- this is critical if you want LND to receive messages from other nodes directly.
Make sure LND is stopped before you run this.
Then, run:
nc -lv 9735
This command listens for packets on port 9735.
Then, you need to get on the command line on any Linux machine, but not this machine, and not your Wireguard SERVER. Find some other linux command line, on some other random Linux machine that you have access to, and run:
echo "Hello, this is a test message!" | nc -q 1 VPS_IP_ADDRESS 9735
But, in place of VPS_IP_ADDRESS use the actual IP address of your node.
You should then see a friendly message on your LND machine, like:
Connection received on 129.35.225.128 34138
Hello, this is a test message!
Modify the LND configuration file
The last step is easy. We have another use for our VPS_IP_ADDRESS.
Ensure LND is not running.
Open the file lnd/PRIVATE/lnd.conf in your editor.
Scroll to the bottom, and you will find this section
# Only For Clearnet
# externalip=
# tor.streamisolation=false
# listen=0.0.0.0
Modify it, comment "in" the last three lines, so it looks like this:
# Only For Clearnet
externalip=VPS_IP_ADDRESS
tor.streamisolation=false
listen=0.0.0.0
But (of course), use your actual VPS IP ADDRESS instead of VPS_IP_ADDRESS.
Don't get confused! Remember how we used a domain? Don't use the domain here, that was only so we could set up wireguard! Use the IP address of the VPS.
Start LND and look for the Clearnet URI
Now, we could construct the Clearnet URI ourselves, but to be sure, let's ask lncli to tell us what it is.
./exec-lncli.sh
lncli getinfo
You should now have TWO addresses in your uris: array:
 "uris": [
        "02a98c86ef366ce226aad6e7706959456e1701058915c3cbf527b37da143bb1441@142.112.129.210:9735",
        "02a98c86ef366ce226aad6e7706959456e1701058915c3cbf527b37da143bb1441@cv3gfm5psg7jm2usffttijfysymnaz5rzbtqto54vngkwhjp542mdzyd.onion:9735"
    ],
Make a note of your Clearnet URI
Your Clearnet URI is the first entry in the array. It will look something like:
02a98c86ef366ce226aad6e7706959456e1701058915c3cbf527b37da143bb1441@142.112.129.210:9735
Make a note of this URI, as you'll be using it in the future on a frequent basis.
If you know how much bandwidth your internet connection has
This will only apply if you are running a node with a lot of channels (maybe 50+). LND can (as of early 2025) sometimes be inefficient in how it handles outgoing communication with other nodes. You can tell Ubuntu to enable qdisc, which will more intelligently manage your outgoing internet traffic.
You should only try to enable qdisc if you are sure you know your outbound bandwidth limit. In this case, let's say you are sure you have 100 megabits (mbps) in outbound bandwidth. In this case, run this command...
sudo tc qdisc replace dev wg0 root cake bandwidth 100mbit nat